 Telephone: 1 450-669-9256
 Email: sales@reefsolution.com



Skip to product information
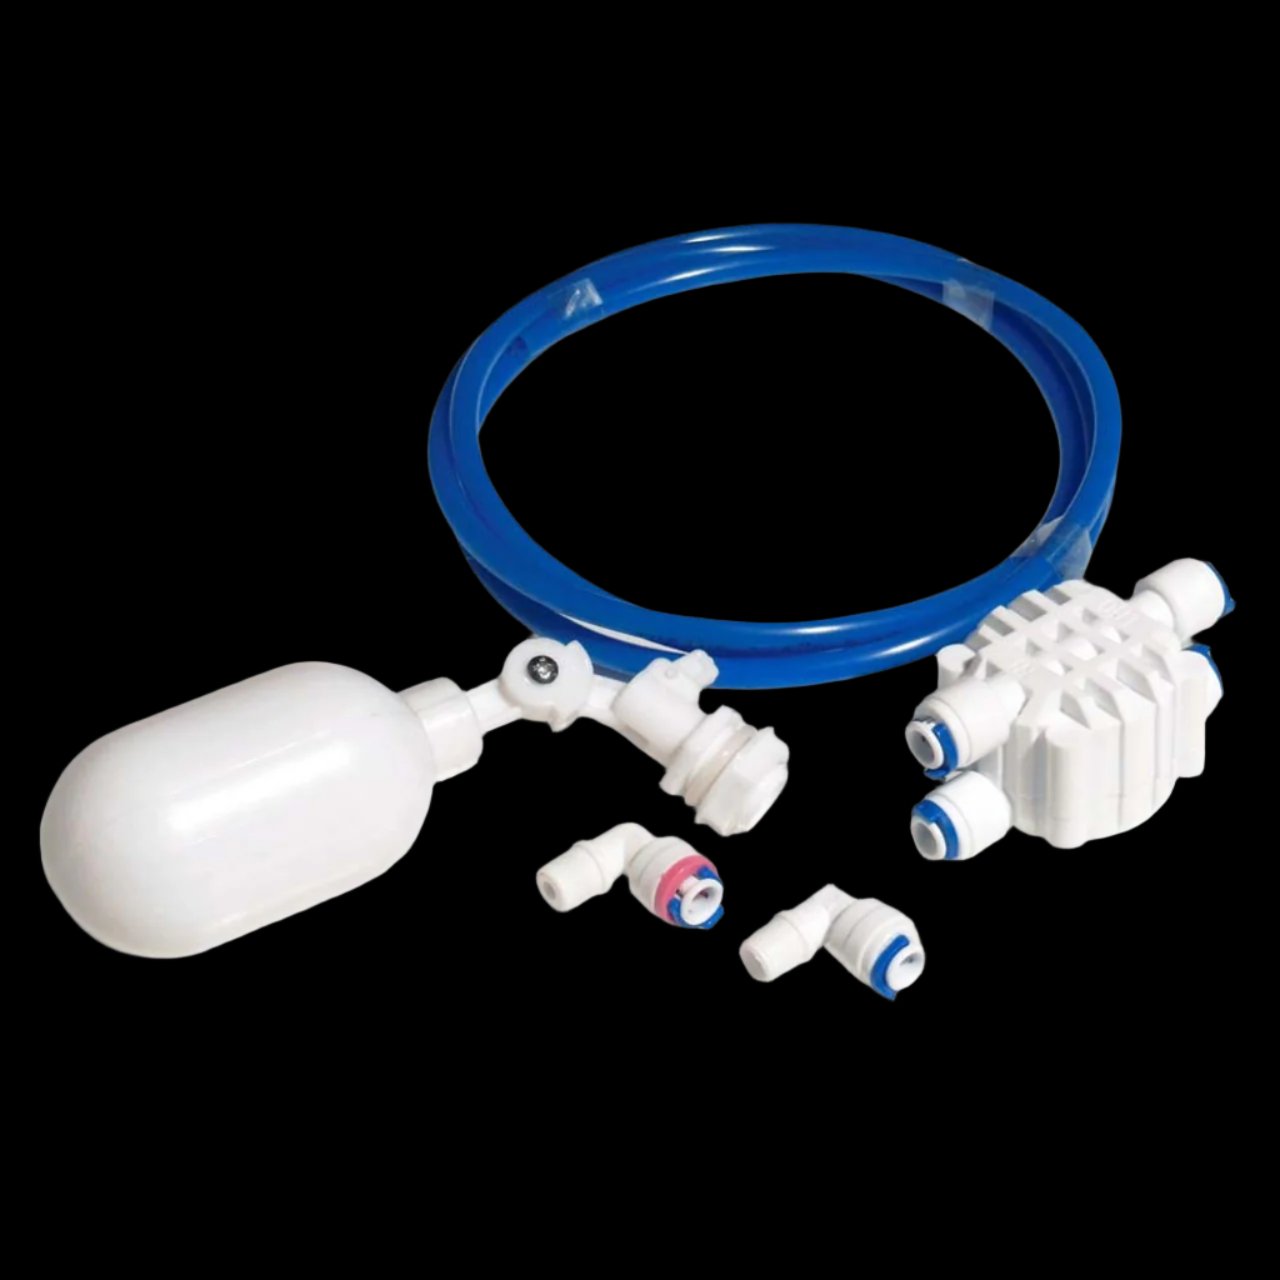
AquaticLife — Automatic Float Valve Kit 1/4 in ATO Auto-Fill RO/DI Reservoir
$39.95
Indisponible
The AquaticLife 1/4 in. Automatic Float Valve Kit lets you automatically fill a reservoir, sump, aquarium or water container and shut off the water supply when the maximum level is reached. An adjustable float sets the target level; once it's touched, the auto shut-off valve closes the flow. A turn-key solution for Auto Top Off (ATO), auto-filling an RO/DI reservoir, or any automatic top-up system.
Official Installation Video (AquaticLife Channel)
Here is the official installation video for the kit, pulled directly from the manufacturer's page and the AquaticLife YouTube channel. It shows the full plumbing sequence and the role of each component.
Full documentation (manufacturer PDF): Download the official AquaticLife Float Valve Installation Manual (PDF).
Kit Contents (No Extra Parts Needed)
AquaticLife is explicit: this kit is complete for use with an RO or RO/DI system - no other components are required. The kit includes:
- Adjustable float valve - 1/2 in. MPT threaded, installs in the reservoir.
- 4-port Auto Shut-Off (ASO) valve - the heart of the system, completely stops the RO unit.
- Check valve - prevents backflow toward the RO system.
- Standard 1/4 in. tubing - included.
- 1/2 in. FPT to Press-Fit adapter - connects the float to standard 1/4 in. tubing.
How the ASO (Auto Shut-Off) Works - The Part People Often Miss
The ASO is essential - and it's the part people install wrong or underestimate the role of. Here is what it actually does, in plain terms:
The ASO valve has 4 ports split across two distinct sides:
- Non-screw side - this is the source water side (before filtration): IN (from house supply) and OUT (to the sediment cartridge).
- Screw side - this is the product water side (after the RO membrane): IN (from the check valve) and OUT (to the float).
The principle: when the float rises in the reservoir and closes its valve, product water can no longer flow out. Pressure builds up on the screw side. That pressure rise trips the internal mechanism of the ASO, which also closes the source side. Result: the RO membrane stops producing, the RO unit shuts down completely, and no more waste water goes down the drain.
Without an ASO: the float closes the outlet but the membrane keeps producing, pressure spikes to maximum in the product line - risk of leaks, tubing rupture, or continuous waste water flow. That's why the ASO is mandatory in an automatic setup.
Circuit Diagram
Here is the connection order for the kit on a standard RO/DI system:
House water supply
        v
[ASO non-screw side - IN]
        v
[ASO non-screw side - OUT]
        v
Sediment cartridge -> Carbon -> RO Membrane -> (DI if applicable)
        v
[Check valve - arrow in flow direction]
        v
[ASO screw side - IN]
        v
[ASO screw side - OUT]
        v
[Adjustable float valve in the reservoir]
Step-by-Step Installation Instructions (Source: Official AquaticLife Manual)
- Insert tubing from the supply water connection into the IN port on the non-screw side of the ASO.
- Insert tubing into the OUT port on the non-screw side of the ASO and connect the other end to the sediment cartridge inlet.
- Install the adjustable float valve inside the reservoir or container to be filled.
- Connect the tubing exiting the RO membrane to the inline check valve. The arrow on the check valve must point in the direction of water flow.
- Insert tubing from the check valve into the IN port on the screw side of the ASO.
- Insert tubing into the OUT port on the screw side of the ASO and connect the other end to the float valve.
- Connect the waste water line to the drain and install the flow restrictor.
Critical Rules to Follow (Manufacturer)
- The check valve arrow must point in the direction of water flow. Installed backwards, the system will not work.
- The screw side of the ASO must be installed facing down.
- The float valve must be installed in the recommended orientation to work properly.
- Mark each tubing 5/8 in. from the end and insert it into the fitting until the mark disappears - this guarantees a leak-free connection.
- Check the entire system for leaks after installation. AquaticLife assumes no responsibility for water damage from leaks.
Technical Specifications
- Format: complete kit for 1/4 in. tubing (industry standard for RO systems).
- Minimum operating pressure: 40 PSI.
- Maximum operating pressure: 80 PSI.
- Float connection: 1/2 in. MPT, height-adjustable.
- Tubing connection: 1/4 in. Press-Fit.
- AquaticLife item: AL500300.
Compatibility (AquaticLife Recommendation)
The kit is designed to connect to most household RO systems using standard 1/4 in. tubing:
- AquaticLife Classic RO/DI (100 GPD).
- AquaticLife Twist-In RO and RO/DI (75 and 100 GPD, models 540370, 540371, 540372, 540346).
- Other brands - APEC, Geekpure, LiquaGen, Reef Octopus and most home RO systems using 1/4 in. tubing.
Not recommended for the RO Buddie 540019: the compact design of the RO Buddie and its network integration are not suited to adding a float valve kit with extra check valve. For an ATO setup, use a direct fill into a small reservoir, or a standard RO/DI system.
Common Use Cases
- Auto Top Off (ATO): automatically maintain freshwater level in a sump or aquarium to compensate for evaporation.
- Auto-filling an RO/DI reservoir: the float stops the RO once the reservoir is full, prevents overflows and saves water.
- Large aquarium or pond: level maintenance without constant supervision.
Why Buy AquaticLife at ReefSolution
ReefSolution is a marine aquarium specialty store based in Laval, Quebec, shipping across Canada. For a complete automated setup:
- AquaticLife Classic 100 GPD RO/DI - compatible RO/DI unit for ATO setup.
- AquaticLife Twist-In 100 GPD 4-Stage RO/DI - compatible standard RO/DI system.
- AquaticLife RO Pressure Gauge 1-150 PSI - confirms pressure is in the 40-80 PSI range required by the float valve.
- AquaticLife Smart Buddie 200 GPD Booster Pump - booster pump if house pressure is below 40 PSI.
- HM Digital TRM-1 - Triple In-Line TDS Monitor - continuously monitors produced water quality.
- HM Digital DM-1 - Dual In-Line TDS Monitor - budget alternative.
Frequently Asked Questions
What exactly does the ASO (Auto Shut-Off) do?
The ASO automatically closes the RO water inlet when the float detects the reservoir is full. Without an ASO, the membrane keeps producing and the RO unit sends waste water down the drain continuously. It's the essential part for a reliable and water-efficient automated ATO.
How do I know which side of the ASO connects to what?
The ASO has 4 ports split between two sides. The non-screw side receives source water (before filtration). The screw side receives product water (after the membrane, via the check valve) and sends water to the float. The two sides are not interchangeable - respect this orientation for the system to work.
What exactly is included in the kit?
Per AquaticLife: the adjustable float valve (1/2 in. MPT), the auto shut-off (ASO) valve, the check valve, the tubing, and a 1/2 in. FPT to Press-Fit adapter. No other components are needed for use with a standard RO or RO/DI system.
Does the kit work with the RO Buddie 540019?
Not recommended. The RO Buddie has a very compact design with limited production flow, and integrating a float valve kit + extra check valve is not suited to it. For an ATO setup, use a standard RO/DI system (Twist-In or Classic).
What minimum water pressure is required?
AquaticLife specifies a minimum of 40 PSI and maximum of 80 PSI. Below 40 PSI, the valve may not fully close or may have a slow response. A Smart Buddie 200 GPD booster pump can compensate for low house pressure.
Does the check valve prevent water flowing back to the RO?
Yes. The check valve included in the kit prevents reservoir water from flowing back into the RO/DI system, which protects the DI resin, membrane and prefilters from reverse contamination. The arrow on the check valve must point in the flow direction (from membrane to reservoir).